My inspiration for this blog!

Thursday, December 22, 2011

Michael Symon's Delicious Homemade Turkey and Dumpling Soup


Anyone who has heard me talk about cooking lately, knows that I have a huge crush on Michael Symon. Not a crush in the sense of “OMG he is so physically attractive!” Not that he is a bad looking guy, but it's more in the sense of my utmost respect for him. I love his techniques, his recipes. I love just watching him cook! Ok, so I am not entirely thrilled that the show he is currently on replaced one of my beloved soap operas, but if The Chew was on the Food Network at a different day and/or time, then I would still watch it. But it is what it is!
My Mom offered me the frame of our Thanksgiving turkey to make stock out of. A day after offering this, I was watching The Chew and Michael Symon made a Turkey Dumpling Soup. I figured what a great way to use whatever leftover turkey there will be from Thanksgiving! I plan on making this soup again right after New Year's, since I will be making another roast turkey right around then. Although this soup is time consuming, it is delicious, a definite winter staple! We happened to eat all of the initial dumplings as the leftover wore on, which is no problem because the dumplings are so simple to make. I reheated the soup until boiling and then made a fresh batch of dumplings. I ran out of chives, but it was ok because the dumplings still came out great! The next time I make this, I plan on freezing half the batch (without the dumplings) since it did yield a lot of servings. When I eat what I freeze, I will definitely update the blog as to how well it froze. If you don't want to make the soup, you can just follow the directions for the broth. Put it into ice cube trays and freeze, then put into a labeled zip-lock bag. It makes a great base for all other soups!

I'm posting the recipe here, but you can also find it, with feedback at www.thechew.com

Yields 8-10 servings

Ingredients:

For the stock:
  • 1 carrot (thickly sliced)
  • 1 tbsp kosher salt
  • 1 bay leaf
  • turkey frame and wings
  • 1 onion (quartered)
  • 1 head of garlic (halved crosswise)
  • 4 sprigs of thyme
  • 1 tablespoon of black peppercorns
  • 2 gallons of water

For the dumplings:
  • 2 eggs
  • ¼ tsp nutmeg
  • 1 cup flour
  • ¼ cup milk
  • ¼ cup chopped chives

For the soup:
  • 1 ½ gallons of turkey stock (made from turkey)
  • 2 large carrots (diced)
  • 2 cloves garlic (minced)
  • roasted turkey meat, pulled from frame and roughly chopped (the recipe calls for 8-10 lbs, but any amount of meat you have leftover will do. Obviously, the more, the meatier.)
  • 2 tbsp unsalted butter
  • 1 large onion (diced)
  • 1 bunch of celery (diced)
  • 1 cup tarragon (chopped)

Directions:
For the stock:
  • Combine all stock ingredients in a large stockpot. Bring to a boil , then reduce to a simmer and skim any impurities that rise to the surface. Simmer for 5 hours. Strain through a fine mesh strainer and discard solids.

For the dumplings:
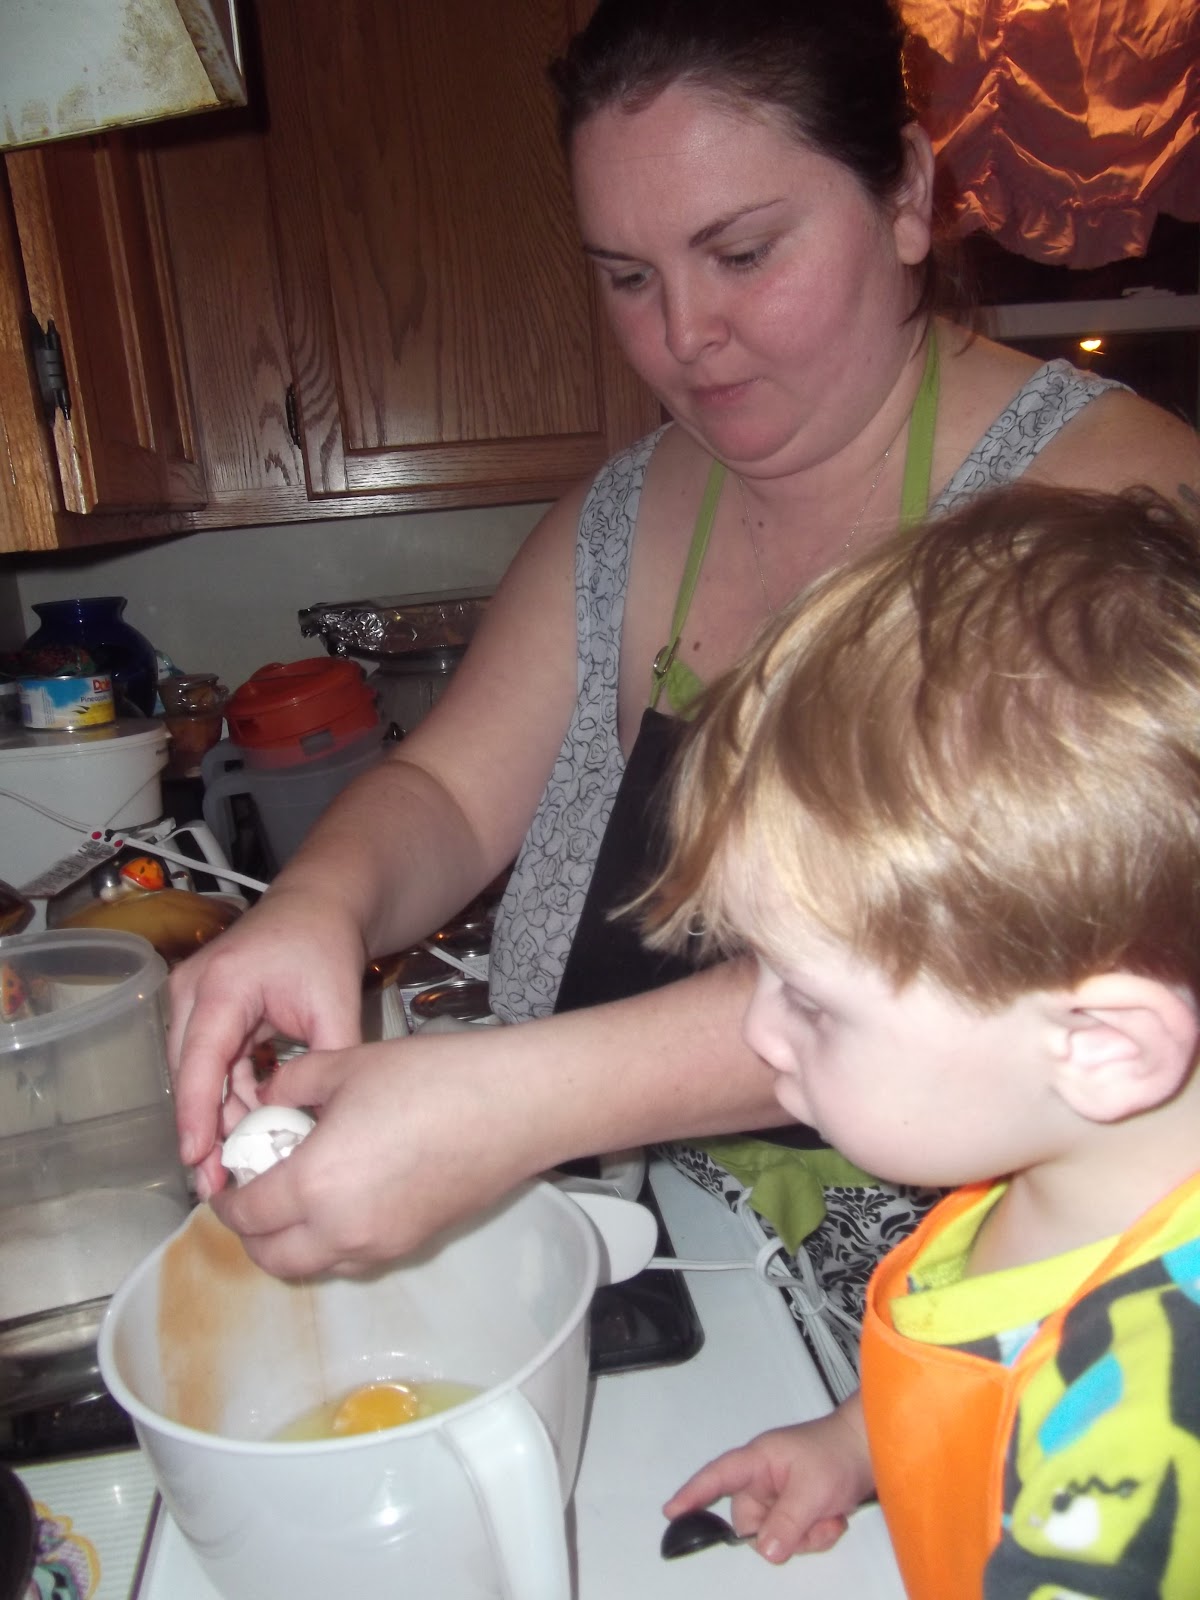
  • Make a well in the flour in a large bowl. In a separate bowl, whisk together eggs and milk. Add the eggs and milk mixture to the well, then add the nutmeg and chives and whisk together until smooth.
For the soup:
  • Heat butter over medium heat in a large stockpot. Add the vegetables with a large pinch of salt, and sweat the vegetables until translucent. Add the pulled turkey and stock, cover and bring to a simmer. Continue to simmer for 45 minutes.

  • Bring soup to a boil and cut dumplings by placing batter on a damp cutting board and using a bench scraper or knife to cut into bite sized dumplings. (You can also just use two spoons, put them into the boiling soup and scoop the dough with one and scrape with the other into the boiling soup) Drop the dumplings into the boiling soup, and wait for them all to float to the surface. Let boil another minute, add tarragon and serve.  

A thankfully simple Turkey Gravy


So this Thanksgiving was a bit bittersweet for my family. My Gram has been in and out of the hospital since July, so she wasn't able to be with us this Thanksgiving. I usually go over to her house in the morning and help her get the turkey in the oven. It is such a wonderful tradition that we've created, and I really hope that one day it continues with my children and either my Mom or myself. Before I volunteered my services, we used to get both Thanksgiving and Christmas catered. While the catering was good, I missed the home-cooked holiday dinner. So for roughly the past 10 years, a little longer if memory serves correct, I've spent every Thanksgiving morning with my Gram. We would chat and prep the holiday dinner, have a cup of tea and watch part of the parade. This year I still wanted to help out any way I could, so in the morning, I went next door to my Mother's and helped her get the turkey in the oven. This was her first year ever hosting Thanksgiving. Although the company was different, the tradition was still the same. We chatted, and I had a cup of tea.
After the prep work was complete, I went home, got ready and the boys and I went to the other side of the family for brunch. But went back to my Mom's for dinner later on. Of course I asked my Mom if she needed any help when I got there, so I wound up making the Sweet Potatoes on a whim. After my Dad took the turkey out of the oven, the topic of a homemade gravy came up. I said that it was simple and that although I've never made it before, I could certainly try it out. Never be afraid to try to cook something. Especially if you have a backup sitting on the counter next to the stove!
My Dad strained the drippings, skimming all the fat off of it, I think we had about 100 ounces altogether. Just take the drippings a little at a time in a saucepan. Adding a teaspoon at a time of flour, whisking it in until you get your desired thickness. Make sure you whisk out any and all lumps. Since the turkey was seasoned with rosemary and thyme, I added a little of each of these spices into each “batch” of gravy that I made. It came out fantastic! It really was so, so simple! From now on, I will be making my own poultry gravies, and saving a huge amount in the long-run! If you become afraid of cooking, afraid of something being too complicated, or of something not coming out edible (never mind even being good!) you genuinely hinder what capabilities you may have. And please, don't just use this advice in the kitchen!


A Pumpkin-ful Thanksgiving Pie


Last year for Thanksgiving I wanted to make our gracious hosts pumpkin pies. However, I didn't decide this until the last minute and the pies were already bought. So I resorted to making pumpkin bread, which was a huge hit. Then, every time we were invited to a friend's house for dinner, I made a pumpkin pie. I wound up accidentally fusing two different pumpkin pie recipes together, and it came out absolutely fabulous! However, a year has passed, and within that year we moved. So of course I can't find the recipe when Thanksgiving-time arrives! After searching for a different, but similar recipe, I finally settled on this one which is from Libby's®! It came out absolutely amazing! It's not quite the same, but I did use the individual spices instead of last year's pumpkin pie spice. I obviously used my own pumpkin puree instead of the canned stuff! I've never made pumpkin anything with the canned stuff which is probably why I've never come across the recipe before (I hear the recipe is on the back of the can). I also used a prepared graham cracker pie crust. With working 45 hours a week now, and I worked up until the day before Thanksgiving; I didn't have time to make my own pie crust. Next year, I'll plan in advance and make and freeze my own pie crusts. This year we did brunch with one side of the family and dinner with the other, so we brought a homemade pie to each! We also made one for our landlords and kept one for ourselves, which was good because Eoin still absolutely LOVES pumpkin pie!  


Yields 8-10 servings

Ingredients:
  • 1 (9-inch) deep dish pie crust, unbaked (you can use homemade or store bought)
  • ¾ cup white sugar
  • 1 tsp ground cinnamon
  • ½ tsp salt
  • ½ tsp ground ginger
  • ¼ tsp ground cloves
  • 2 eggs
  • 2 cups of homemade pumpkin puree, or 1 (15-ounce) can of canned pumpkin puree
  • 1 (12-ounce) can of evaporated milk

Directions:
  1. Preheat oven to 425º F.
  2. Combine sugar, salt, cinnamon, ginger and cloves in a small bowl. Beat eggs lightly in a large bowl. Stir in pumpkin and sugar-spice mixture. Gradually stir in evaporated milk. Pour into pie shell.
  3. Bake for 15 minutes. Reduce heat to 350º F and bake for an additional 40-50 minutes. You can tell the pie is cooked all the way through by inserted a knife into the center. If the knife comes out clean, it's done! Cool on a wire rack for 2 hours. You can then serve it or refrigerate it for later use.
    A very important note on this recipe: DO NOT FREEZE! Freezing will cause the filling to separate from the crust.


Friday, October 28, 2011

Do it yourself Pumpkin Puree

Nothing beats real homemade pumpkin pie or pumpkin bread.  Homemade down to the pumpkin puree!  Mmmmm good!  The best part?  It's not ridiculously hard either.  I will forewarn you, it is incredibly messy, and a bit time consuming.  
I like doing this because it is the second year we're doing it, and it is a great project for the whole family.  Bill and Eoin both helped this year.  It's become one of our fall traditions!  Word to the wise, this is a project best reserved for a free day.  I, however, decide to make my life unnecessarily hard and did this and the chicken stock in the same night!  
For the past two years we have gotten one large pumpkin when we've gone pumpkin picking and instead of carving it and letting it rot on our doorstep, we've decided to put it to good use.  Bill loves my pumpkin bread, as well as my pumpkin pie, and one large pumpkin renders enough pumpkin for us for 1 year.  Every now and then, I'll make a pumpkin bread or pie for the 3 of us, and during the fall and winter, I bring either when we are invited over to friends or families houses for dinner.  Last year, I would mix the pumpkin puree with plain yogurt and make a sort of custard for Eoin, which really didn't go over too well, but it is an idea for anyone else who may be interested.  
Now, how to make your very own puree:


Take your pumpkin and scrub the outside, pat dry. 


Cut your pumpkin in half, then into quarters, keep cutting it down into large chunks that can easily fit into baking dishes, baking pans, roasting pans, etc.  (Make sure to discard the stem, you're not roasting that)  Scrape the pieces clean of any and all seeds and gunk.  You can save the seeds and roast them.


You can add a little bit of water to the bottom of the pans.  Bake at 300º for about an hour.  I would check at 30-35 min.  Insert a knife or fork, to check for tenderness.  If it goes in and out easily, it's tender and ready!


Let the pumpkin pieces sit in the tray until cool.  


When the pumpkin is cool to the touch, cut the flesh of the pumpkin away from the shell.  Put the scraped pumpkin into a food processor and puree until smooth.  (This is a great part where your kids can help, DO NOT LEAVE YOUR CHILD UNATTENDED!  When Eoin helps me, I am ALWAYS right there next to him!)


Or, you could use a hand masher, you will have SOME lumps in the mixture.


I then label baggies with either 1 cup or 2 cups Pumpkin Puree and the date it was made.  Freeze flat.  To thaw, place baggie in a bowl and put in the refrigerator overnight.  Stays good frozen up to 1 year.


Making your own chicken stock

Today is the perfect day for a nice bowl of soup!  To set up the scene, Fall in New York has finally come with a vengeance as October ends.  I am sitting here in my living room with the space heater going full blast, since we've had such nice weather, my landlords have not turned the heat on yet.  For lunch, I'm pretty sure I'll have a nice bowl of Progresso soup.  I am planning on making my famous Potato and Leek soup next week.  
Chicken stock is usually the base for any soup.  I have bought so many cans over the years with each grocery shopping trip.  Every time I roast a chicken I say, "I'll save the bones next time!"  Well next time has come and gone for some time now!  I finally did it!  The last time I made a roast chicken, I saved the bones!  It's really a simple, no-brainer recipe.  That being said, it is very tedious and time consuming. 

I'm not going to give you my usual lay-out for a recipe.  Mainly because this is a little bit of this, a little bit of that kind of recipe.  It is solely based on what you prefer, almost like chicken soup and rice.  I've looked up so many ways to make this, from stove top, to slow cooker.  You can use the bones, you can use the giblets (except for the liver), you can have some meat in there too.  I made mine using just the frame of the chicken with some back meat on it.  
So after you have your chicken dinner, pull the rest of the meat from the frame that you will be saving for leftovers.  If you are not making the stock right away (it takes 3-4 hours just for the cooking portion of it), place in a zip-lock bag, or even a shopping bag and knot.  Place in the refrigerator if you will be using within the next day or two, the freezer if it's going to be much longer than that.
When you are ready to cook, place the frame into a large stock pot.  I cut mine up a little using kitchen shears so it fit a little nicer. Cover the bones in cold water.  

You can wait to add your vegetables, but I added mine from the beginning and it came out fine.  I chopped up some carrot, pretty much 3/4 of a baby carrots bag.  I chopped up about 4 stalks of celery.  (I tried to keep a visual balance between the carrots and celery).  I only used 1 onion, but you can certainly add another.  

Spices are another thing that is left up to personal preference.  I used 2 bay leaves, parsley, salt and pepper.  Use a little, you can always adjust the flavors at the end. 


So pretty much this is going to simmer about 3-4 hours.  Your liquid is going to reduce some and become more concentrated.  I actually split mine up into two pots because I had so much!  Every so often, you need to skim the fat from the top of the pot.  After it is done simmering, I strained the stock into storage bowls.  You want to strain out the veggies, meat and bones; only reserving the liquid.
Unless you plan on using the 2 quarts this is going to yield, I started pouring mine into empty ice cube trays.  After they freeze, transfer into a labeled zip-lock bag.  You want to put the contents and the date made on it. Each cube is about 1 ounce.
 

When you need to use some stock for a recipe?  Just pop out a few cubes and either defrost in the fridge, pop in the microwave, or throw into your pan or pot!  
Although it is time consuming, it really is just that easy!

Tuesday, October 11, 2011

Pasta 'e' Broccoli

This is another one inspired from "The Chew."  The recipe called for cauliflower and angel hair pasta, but I swapped it out for broccoli and spaghetti.  Let me just say, it was a fantastic hit in my house!  Eoin, Bill and I absolutely LOVED it!  Over the summer Eoin started trying broccoli, raw and cooked, and seemed to like it a lot.  Luckily, he still likes broccoli!  I welcome any changes from the plain old pasta and marinara!  The directions are going to be the same regardless if you use the broccoli or cauliflower, it's just left up to what you prefer.  Next time, I will make it with the cauliflower and I'll update my feedback at that time.  And don't think that you don't have time to make a dinner like this!  It seriously takes UNDER 10 minutes to make!  


Yields 4-6 Servings


Ingredients:


  • 1 bunch cauliflower or broccoli
  • 1 lb pasta (angel hair, spaghetti, linguine, fettuccine, your choice)
  • 1 Tbsp Olive Oil
  • 3 garlic cloves 
  • 1 jar capers  (I didn't have capers on hand so I used green olives with a tablespoon or two of the juice for the desired "saltiness")
  • Parsley, for garnish (Can use fresh or dried, whichever you have on hand)
  • About 3 tablespoons of Parmesan Cheese
  • About 2 tsp red pepper flakes, depending on taste
Directions:
  • Bring a pot of salted water to boil.  Add the pasta, cooking 1 minutes less than box instructions for al dente.
  • While your pasta is cooking, heat 1 Tbsp oil in a large skillet.  Chop cauliflower or broccoli into bite-sized bits.  Chop up your garlic and, if using fresh parsley, your parsley.  When oil is heated, add your cauliflower or broccoli, followed by the garlic, the red pepper flakes, the olives with the splash of olive juice (or the jar of capers).  (The key is to NOT overcook your cauliflower or broccoli, you don't want it limp.  And you don't want the garlic on the heat too long, you don't want it to burn!  You want it to be cooked, but crisp!)  Stir to incorporate.
  • When the pasta is done cooking, DO NOT DRAIN!  Use tongs to take the pasta from the pot and add to skillet.  Add a ladle or two full of the pasta sauce to the skillet to help create a sauce.  Sprinkle with Parmesan cheese and parsley and mix thoroughly.  You can use more parsley and cheese for a garnish.

Monday, October 10, 2011

Cheesy, Creamy Mac-N-Cheese


So...I may get some flack for this post.  Don't get me wrong but I do ABSOLUTELY LOVE "All My Children", and it was heart-wrenching to see the show end it's run on ABC.  I know some people may have totally stopped watching ABC weekdays at 1 PM and went to another channel.  That being said, I do enjoy "The Chew".  In the short time that show has been on, I feel like I've picked up so many little tricks!  I plan on making DIY table runners for the holidays (of course when I do this, I will post about it!).  
Last week I was planning on making a different version of Mac-n-Cheese with whatever I had laying around.  I've done 3 versions:  The Velveeta box recipe, a slow-cooker version, and the Kraft version!  As luck would have it, "The Chew" did a version of Mac-n-Cheese on the show that day!  Alas, my side dish was born!  I did change/substitute parts of it because I used what I already had.  Like I've said before, any and all of my changes/suggestions will be italicized.

Yields about 8-10 servings

Ingredients:

  • 1 lb of elbow macaroni (I used cavatappi)
  • 3 Tbsp flour
  • 1 cup carmelized onions
  • 1 cup white cheddar, grated*
  • 2 cups breadcrumbs
  • 3 Tbsp butter
  • 1/2 cup chopped parsley to garnish (less if using dried parsley)
  • 6 strips bacon, cooked and crumbled (I used to sliced of deli ham, fried up and chopped)
  • 1 1/2 cups milk (skim, low-fat, or whole, according to your preferences)
  • 1 cup pepper jack cheese, grated*
  • 4 oz cream cheese (half of stick)
  • 2 cloves garlic, minced
  • salt and pepper, to taste
*You may use whatever cheese you have readily available.  I used 1 cup of a Mexican blend, and then 1/2 cup of Swiss and 1/2 cup of Cheddar.  It's based on whatever your personal preferences are.  There is NO WRONG WAY!  

Directions:
  1. Bring large pot of salted water to a boil; add the pasta and cook until al dente, about 7 minutes.  Drain. (I hear this over and over again, on this show included.  Whatever your package directions say, cook one minute less, if you plan on still cooking the pasta in the sauce.)
  2. In a saucepan, cook bacon until crispy.  Remove bacon, reserve drippings in saucepan.  Add and melt 2 Tbsp butter in same saucepan over medium heat.  Stir in the flour with a wooden spoon until smooth.  Whisk in the milk, and stir until thick, about 2 minutes.  Whisk in the cheese until smooth.  Stir in carmelized onions, bacon and pasta.
  3. In a skillet over medium heat, combine all ingredients for breadcrumbs.  Allow to toast.
  4. Serve into bowls.  Top with breadcrumbs and crumbled bacon.  Sprinkle with parsley.

Friday, September 30, 2011

Ricotta-Stuffed Potatoes

This is a long overdue recipe posting.  This is another from Betty Crocker:  The Big Book of Slow Cooker, Casseroles & More.  These potatoes were good, but I found them to be a little TOO heavy.  The recipe says that each serving is 1 full potato, or 2 stuffed halves.  I honestly think that that is way too much.  I would cut the serving size in half*.  These potatoes are THAT filling!  As always, I am open to any and all opinions/suggestions!  If you try them out, or modify them, let me know!  I may make them again in the winter, they truly are a comfort food!

Yields 12* (See note above)servings

Ingredients:
ñ     6 medium baking potatoes
ñ     1 ½ cups ricotta cheese
ñ     1 cup grated Parmesan cheese
ñ     ¼ cup chopped fresh parsley
ñ     ¼ tsp pepper
ñ     1 egg, beaten
ñ     Additional chopped fresh parsley, if desired

Directions:
ñ  Heat oven to 375ºF.  Bake potatoes about 1 hour or until tender.
ñ  Cut each potato in half crosswise; scoop out inside into large bowl, leaving a thin shell. 

     Mash potatoes until no lumps remain.  Stir in cheeses, ¼ cup parsley, the pepper and egg until well blended. 
ñ  Increase oven temperature to 400ºF.  Cut thin slice from bottom of each potato half if needed to stand upright.  Place shells on ungreased 15x10x1-inch pan with sides; fill shells with potato mixture.
ñ  Bake about 20 minutes or until hot.  Garnish with additional parsley.

Patty Melt Panini

I love getting my subscription magazines, not only for the dinner ideas and the new recipes to try, but also for the crafts!  I'm going to start incorporating crafts into this blog.  Arts and Crafts ideas for the kids, and ideas for the grown ups too! 
Family Circle seems to always have great ideas.  This recipe is from the October 1, 2011 issue.  It was under a collection of recipes for ground beef.  In any recipe that calls for ground beef you can always substitute ground turkey, chicken or pork.  The flavors of the meal WILL change slightly, so be aware!  I loved that I didn't need a panini press to make this meal!  I never knew that I could use my George Foreman grill to make paninis!  You learn something new every day!  These burgers reminded me of a Reuben.  The crunchiness of the onions, the Thousand Island dressing, the Rye Bread, it was terrific!  And filling!

Makes 4 servings

Ingredients:
ñ     2 tablespoons unsalted butter
ñ     1 large Vidalia or other sweet onion, sliced
ñ     1 lb lean ground beef
ñ     1 Tbsp Worcestershire sauce
ñ     ½ tsp garlic powder
ñ     ½ tsp dried oregano
ñ     ¼ tsp black pepper
ñ     8 slices of seedless rye bread
ñ     ¼ pound thinly sliced reduced-fat American cheese (about 8 slices)
ñ     ¼ cup light Thousand Island salad dressing

Directions:

ñ  Heat butter in large nonstick skillet over medium heat.  Add onion and cook, stirring occasionally, 20 minutes.
ñ     Meanwhile, combine ground beef, Worcestershire sauce, garlic powder, oregano and pepper in a medium bowl.  Shape into 4 patties, trying to mimic the shape of the rye bread.
ñ  Heat a panini press or a George Foreman grill to medium hot.  Grill beef patties for 3 to 4 minutes.  Remove to a plate.
ñ  Place 4 slices of rye on a cutting board.  Top each with 1 slice of cheese, a beef patty, ½ cup onions, 1 slice of cheese and another slice of bread.  Grill 2 sandwiches for 3 minutes, then repeat with remaining 2 sandwiches.  Serve with salad dressing on the side. 

Why this blog exists

Why this blog exists
Me and my favorite little helper in the kitchen!